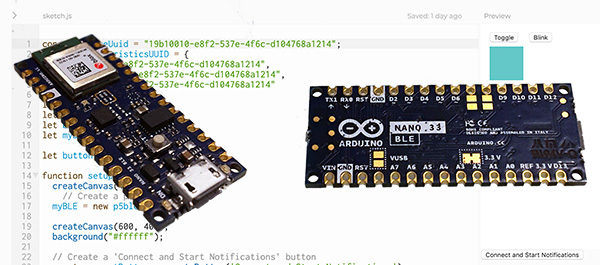
Oggi completo la descrizione del progetto Arduino Nano 33 BLE sketch che hai letto negli scorsi articoli.
Se non hai letto gli altri articoli ti riporto il link ai due precedenti legati a questo argomento:
in cui hai letto l’origine del progetto pubblicato sul sito arduino.cc e la prima modifica che ho realizzato aggiungendo la funzione Blynk lato p5Js.
In questo articolo leggerai lo sketch che deve gestire la funzione ed gli UUID Bluetooth per gestire dal codice Js la comunicazione.
Lo sketch arduino Nano 33 BLE sketch
lo sketch che segue è una modifica derivata da quello principale del progetto da cui sono partito ed al quale potrai aggiungere l’UUID del Blynk:
/*
  Button LED

  This example creates a BLE peripheral with service that contains a
  characteristic to control an LED and another characteristic that
  represents the state of the button.

  The circuit:
  - Arduino MKR WiFi 1010, Arduino Uno WiFi Rev2 board, Arduino Nano 33 IoT,
    Arduino Nano 33 BLE, or Arduino Nano 33 BLE Sense board.
  - Button connected to pin 4

  You can use a generic BLE central app, like LightBlue (iOS and Android) or
  nRF Connect (Android), to interact with the services and characteristics
  created in this sketch.

  This example code is in the public domain.
*/

#include <ArduinoBLE.h>

const int ledPin = LED_BUILTIN; // set ledPin to on-board LED
const int buttonPin = 4; // set buttonPin to digital pin 4

BLEService ledService("19B10010-E8F2-537E-4F6C-D104768A1214"); // create service

// create switch characteristic and allow remote device to read and write
BLEByteCharacteristic ledCharacteristic("19B10011-E8F2-537E-4F6C-D104768A1214", BLERead | BLEWrite);
// create button characteristic and allow remote device to get notifications
BLEByteCharacteristic buttonCharacteristic("19B10012-E8F2-537E-4F6C-D104768A1214", BLERead | BLENotify);
BLEByteCharacteristic blinkCharacteristic("19B10013-E8F2-537E-4F6C-D104768A1214", BLERead | BLEWrite);

void setup() {
  Serial.begin(9600);
  while (!Serial);

  pinMode(ledPin, OUTPUT); // use the LED as an output
  pinMode(buttonPin, INPUT); // use button pin as an input

  // begin initialization
  if (!BLE.begin()) {
    Serial.println("starting BLE failed!");

    while (1);
  }

  // set the local name peripheral advertises
  BLE.setLocalName("ButtonLED");
  // set the UUID for the service this peripheral advertises:
  BLE.setAdvertisedService(ledService);

  // add the characteristics to the service
  ledService.addCharacteristic(ledCharacteristic);
  ledService.addCharacteristic(buttonCharacteristic);
  ledService.addCharacteristic(blinkCharacteristic);

  // add the service
  BLE.addService(ledService);

  ledCharacteristic.writeValue(0);
  buttonCharacteristic.writeValue(0);
  blinkCharacteristic.writeValue(0);

  // start advertising
  BLE.advertise();

  Serial.println("Bluetooth device active, waiting for connections...");
}

void loop() {
  // poll for BLE events
  BLE.poll();

  // read the current button pin state
  char buttonValue = digitalRead(buttonPin);

  // has the value changed since the last read
  boolean buttonChanged = (buttonCharacteristic.value() != buttonValue);

  if (buttonChanged) {
    // button state changed, update characteristics
    ledCharacteristic.writeValue(buttonValue);
    buttonCharacteristic.writeValue(buttonValue);
    blinkCharacteristic.writeValue(buttonValue);
  }

  if (ledCharacteristic.written() || buttonChanged) {
    // update LED, either central has written to characteristic or button state has changed
    if (ledCharacteristic.value()) {
      Serial.println("LED on");
      digitalWrite(ledPin, HIGH);
    } else {
      Serial.println("LED off");
      digitalWrite(ledPin, LOW);
    }
  }

  if (blinkCharacteristic.written() || buttonChanged) {
    // update LED, either central has written to characteristic or button state has changed
    if (blinkCharacteristic.value()) {
      Serial.println("LED on");
      blinkLed();
    }
  }
}

void blinkLed() {
  digitalWrite( LED_BUILTIN, HIGH ); delay(1000);
  digitalWrite( LED_BUILTIN, LOW  ); delay(1000);
  digitalWrite( LED_BUILTIN, HIGH ); delay(1000);
  digitalWrite( LED_BUILTIN, LOW  ); delay(1000);
  digitalWrite( LED_BUILTIN, HIGH ); delay(1000);
  digitalWrite( LED_BUILTIN, LOW  );
}
la prima modifica riguarda la linea 031 in cui definisci un ulteriore UUID, quello relativo al blinkCharacteristic che come avrai notato è il medesimo UUID che avevi impostato nel codice p5Js;
avendo definito un nuovo identificativo da assegnare ad una nuova caratteristiche dovrai eseguire l’aggiunta della stessa al servizio: ledService;
la linea 055 usa il metodo addCharacteristics per aggiungere l’UUID definito al servizio principale.
linea 062: come per le altre due caratteristiche già definite scrivi il valore “0” anche su questa caratteristica;
All’interno della funzione loop() il codice che si occupa della gestione di questa nuova caratteristica è nelle linee dalla 098 alla 103;
la linea 098 valuti se ci sono informazioni scritte sulla caratteristica o se il pulsante ha cambiato stato;
linea 100: valuti se il valore letto sulla caratteristica è true o false ed utilizzi questa informazione per decidere quando attivare la funzione blinkLed() per ottenere il lampeggio del led builtin;
linee 107-114: definisci la funzione blinkLed il cui scopo è semplicemente quello di alternare il lampeggio del led con cadenza 1 sec.
Conclusioni del progetto arduino Nano 33 BLE sketch
La modifica del progetto arduino Nano 33 BLE sketch conclude la serie di articoli in cui hai visto come aggiungere una nuova funzionalità BLE ad un progetto esistente.
Il video seguente, già visto nel precedente articolo, ti mostra il funzionamento del progetto stesso:
Ora sai come affrontare la comunicazione BLE con l’arduino nano ed il codice p5Js BLE.


 Il blog mauroalfieri.it ed i suoi contenuti sono distribuiti con Licenza